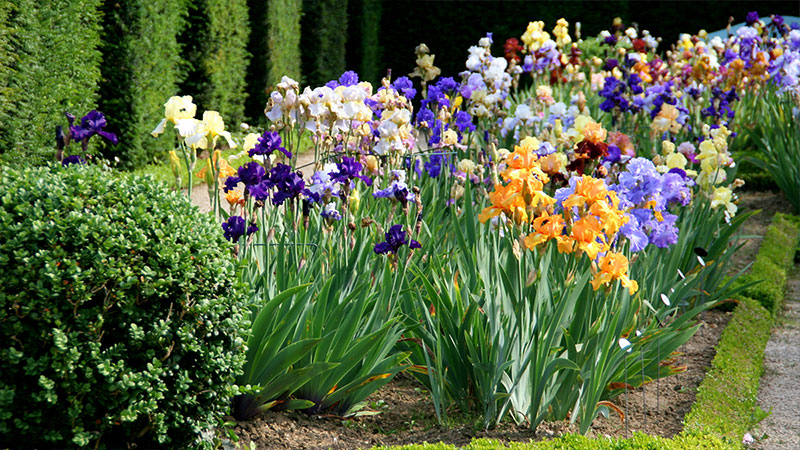
Irises will thrive and reward you in Kentucky, with a minimal amount of care. With 6+ hours of sunlight each day and soil that dries out regularly, most irises will grow and multiply easily, offering beautiful blooms each spring (and sometimes in the fall).
Initial Planting
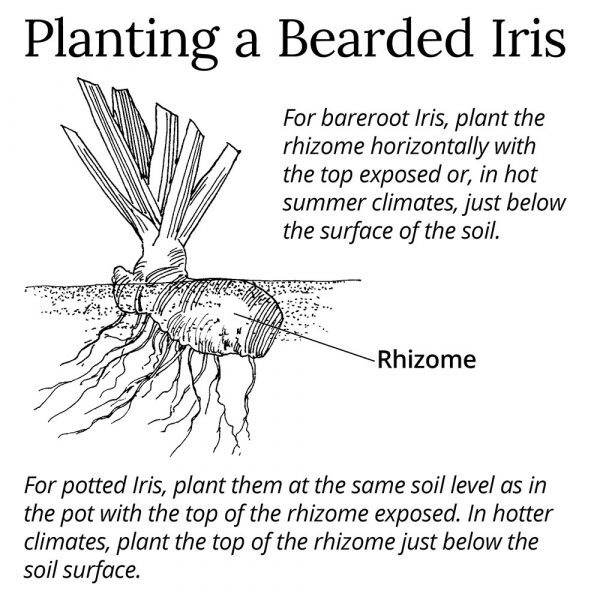
When you plant your iris rhizome(s), you’ll want to plant them with only a minimal covering of dirt over the rhizome. Once the plant is settled, the top of the rhizome should be at soil level, exposed to the sun. If planting more than one of the same type, you can plant two or three of them together in a new clump, but make sure the “toes” are facing each other and the fans of leaves as far apart as possible. Each rhizome (or new clump) should be 12-18” apart. When planting the iris, it is good to mix in a fertilizer like 5-20-20 to encourage root growth. You may also need lime to balance the soil pH to a neutral 7, if indicated by soil tests. Keep them lightly watered over the next several weeks, and then let nature take its course.
For more information on how to divide and clean irises, click here.
Iris Growing Tips
No matter which varieties you choose to grow, there are a few things you can do to help bearded irises thrive in your garden. Follow these tips for the healthiest plants and best blooms:
Plant them in a sunny spot in late summer
The plants need well-drained soil and at least six hours of sunlight per day. A full day of sun is even better to keep the rhizomes dry. (The rhizomes are the fleshy rootlike structures at the base of the plant.)
Prepare their beds throughout the year
Use a low-nitrogen fertilizer and apply it twice a year: In early spring and just after bloom when the rhizomes are forming the next year’s flowers. Only water only if it’s extremely dry or after transplanting.
Give them enough room to breathe
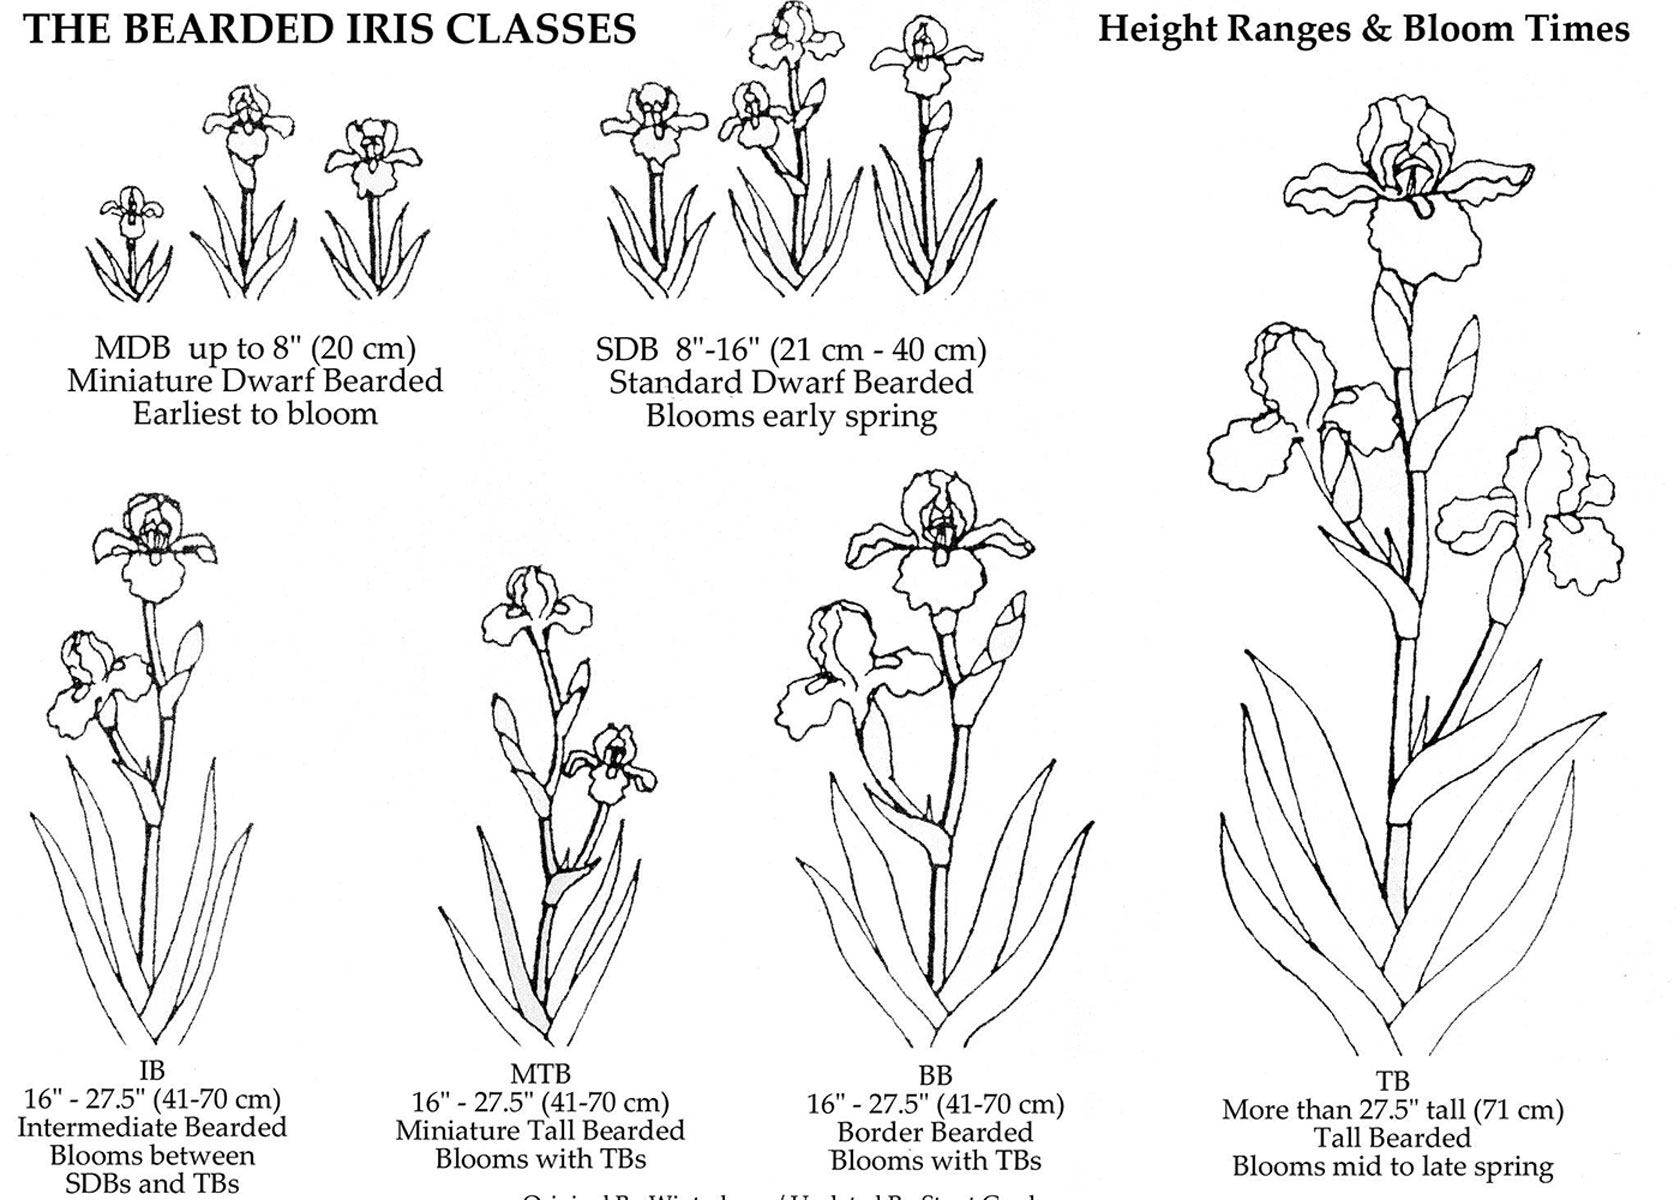
Bearded iris need good air circulation. Plant them a minimum of 16 to 18 inches apart (less space for dwarf irises and more for tall bearded iris varieties).
Make dividing clumps or irises a habit
Divide clumps of bearded iris plants every three to four years in late summer.
Remove seedpods after the blooms have faded.
This prevents seedlings from choking the surrounding soil. Seed formation also saps energy needed by the rhizomes, roots, and leaves.
Prune back the foliage in the fall
This will reduce the chances of overwintering pests and diseases.
Spring Season Care
Springtime is also the best time to prevent iris borers, the most destructive pest that affects irises. It is the larva of a moth, and it eats into the rhizome and destroys it from within. While pesticides should be used judiciously, they are the most reliable method for preventing a borer infestation.
The most effective borer prevention insecticides contain Merit®, also known as Imidacloprid. It can be found in garden supply stores and home improvement stores, often combined with a fertilizer. Use it every 6 weeks or so until summer, especially right before the irises start blooming.
Kentucky’s blooming season starts in mid to late April and continues through the end of May, more or less. In normal years, peak bloom for TB irises is around May 10-20. Once a stalk is completely done blooming, remove it at the base of the plant with a clean cut or break.
Summer Season Care
In the summer, keep the plants free of weeds so the rhizomes see the sunshine. Keep removing dead or diseased foliage, but never cut back or remove healthy leaves unless absolutely necessary, or unless transplanting. Dispose of diseased iris foliage off of your property, so you don’t create a breeding ground.
July is the best time to divide, share and replant irises. Only rhizomes that have not yet bloomed will produce flowers next year. These are usually younger rhizomes that have budded off of an older rhizome. When sharing, gently remove the dirt and wash the rhizome in water that has a small amount of bleach in it (to kill any diseases or pests). At this time it is OK to cut half to 2/3 of the foliage off. Replant the iris with 12-18 inches of space around it in all directions, with the top of the rhizome even with the soil surface. See further instructions above for replanting.
A small fraction of irises will naturally rebloom in the fall. If you’re lucky enough to have one or more of these, just treat them with a little extra fertilizer and water during the early fall. Make sure to cut off spent bloom stalks in the late fall, even if everything around it seems dormant – this prevents rot, and helps to set you up for another great bloom season in the spring.
Fall Season Care
In the fall, established irises may benefit from additional fertilizer. You should use fertilizer without much nitrogen; or if you use one with nitrogen, find one that has sodium nitrate instead of ammonium nitrate (sodium nitrate doesn’t last as long, so it doesn’t encourage growth in late fall, when the iris should be entering dormancy). Reblooming irises in particular will need this additional feeding, since they can grow almost twice as fast as most irises, which bloom only once a year
Winter Season Care
During the winter, you can mostly forget your irises. It’s OK if they accumulate some leaf litter around them, as long as their leaves are still exposed to the sunlight. In February or March, as new growth is just beginning, clear away this debris, cut off or gently pull off dead or diseased leaves, and make sure the rhizomes aren’t buried in soil.
This is also the best time to fertilize irises – you’ll remember to do this when you see crocuses beginning to bloom. Use a balanced fertilizer like 10-10-10, but nothing where the first number (nitrogen) is greater than the others.
How to Divide Bearded Iris
STEP 01.
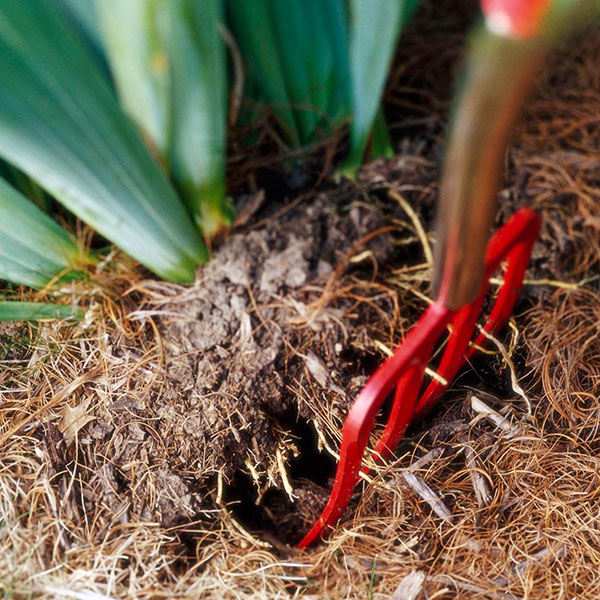
Dig Up Clumps
Carefully dig the clumps with a garden fork or spade, taking care not to chop into the rhizomes more than necessary.
STEP 02.
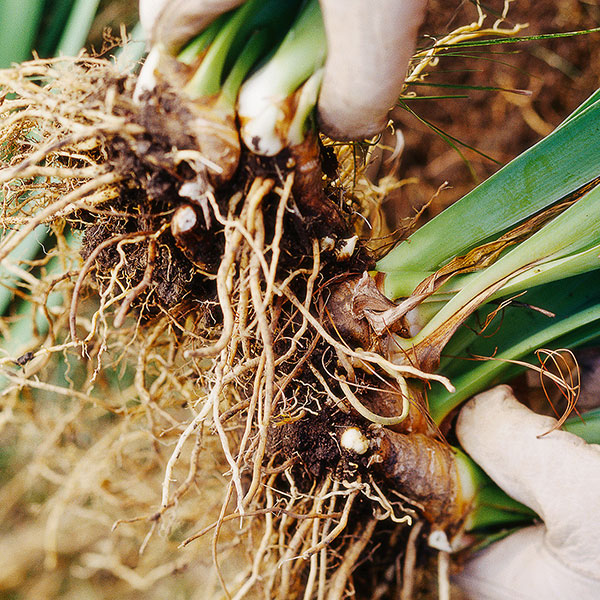
Break Apart Rhizomes
Divide the rhizomes by pulling them apart with your hands. In some cases, you might need a sharp knife to separate the smaller rhizomes from the main one. If so, dip your knife into a 10-percent bleach/water solution between cuts so you don’t spread any diseases to new rhizomes.
A good rhizome will be about as thick as your thumb, have healthy roots, and have one or two leaf fans. Large, old rhizomes that have no leaf fans can be tossed out.
STEP 03.
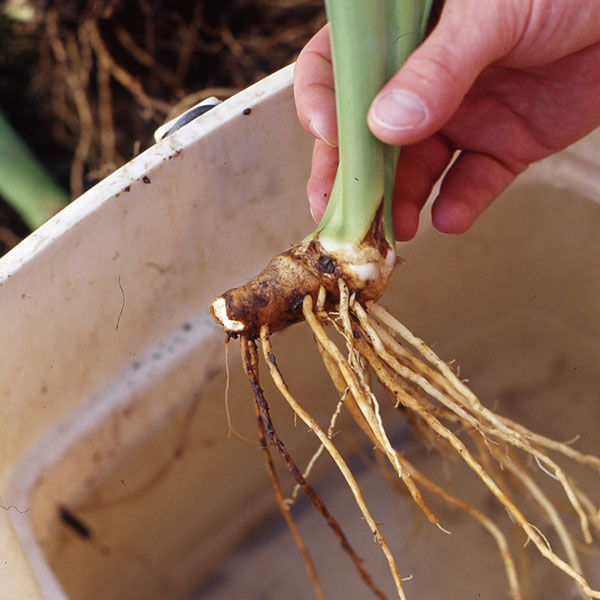
Rinse and Evaluate Rhizomes
Wash the soil off the rhizomes so you can inspect each one for iris borer (a plump, white worm). If you find a borer, destroy it. Some gardeners like to wash their iris rhizomes in a 10-percent bleach solution to protect against disease, but that won’t help plants that are already rotting. Make sure to discard any soft, smelly rhizomes you find, as well as any that feel lightweight or hollow, or that look dead, like the rhizome shown above.
STEP 04.
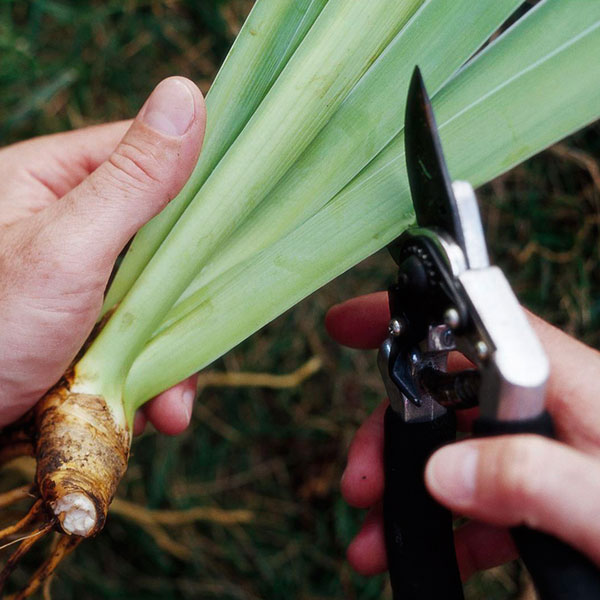
Cut Leaves
Clip off the leaf blades so that they’re 4 to 6 inches long. This reduces the stress that the plant goes through as it concentrates on regrowing new roots instead of trying to maintain long leaves.
STEP 05.
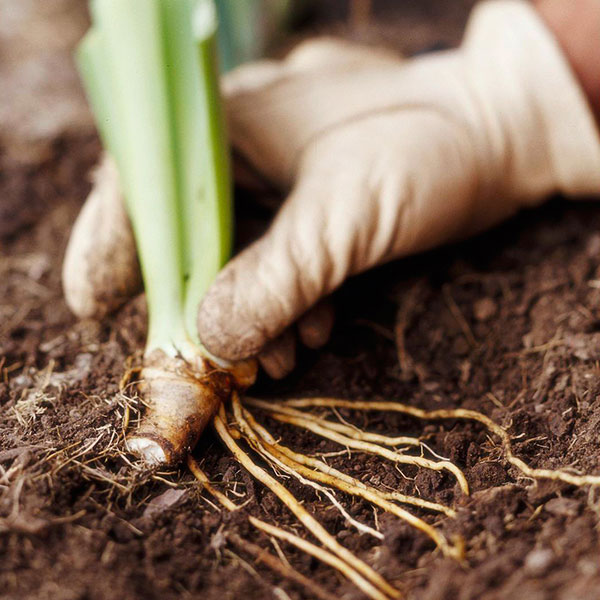
Plant Divisions
Replant divisions, setting the rhizome higher in the planting hole than the fine roots, which should be fanned out. A bit of the top surface of the rhizome should be just visible at the soil surface.
STEP 06.
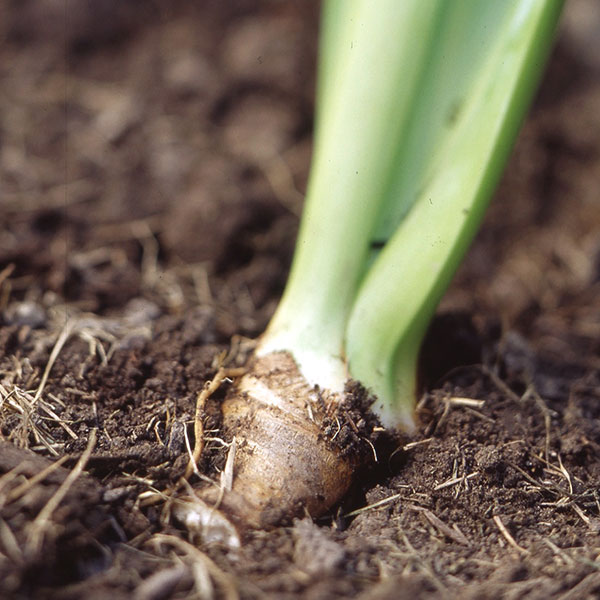
Plant Remaining Rhizomes and Water
Space the plants 12 to 18 inches apart (closer for dwarf varieties, farther apart for the largest). For the best display, plant the rhizomes so the fan of leaves face the same direction. Water well when planting bearded iris rhizomes, but don’t continue to water unless the weather becomes dry.